Videos
Large Format Displays
- M Series:M651, M551, M491, M431
- MA Series:MA431, MA491, MA551
- ME Series:ME431, ME501, ME551, ME651
- P Series:P435, P495, P555
- UN Series:UN552, UN552V, UN552S, UN552VS, UN552A, UN492S, UN492VS, UN462A, UN462VA
Desktop Displays
Large Format Displays
M Series
- M651, M551, M491, M431
Raspberry Pi Compute Module 0:09
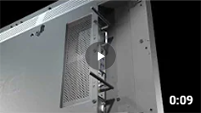
This video describes the Raspberry Pi Compute Module installation procedure for installers.
Smart Display Module Large 0:09
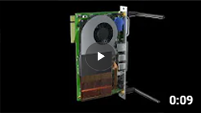
This video describes the Smart Display Module Large installation procedure for installers.
MA Series, P Series
- MA431, MA491, MA551
- P435, P495, P555
Raspberry Pi Compute Module 0:09
This video describes the Raspberry Pi Compute Module installation procedure for installers.
Smart Display Module Large 0:09
This video describes the Smart Display Module Large installation procedure for installers.
DUAL DAISY CHAIN MODE 2:06
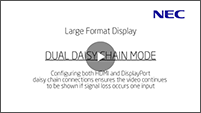
This video will show you how to set up the dual video daisy-chain connection (feed wiring) between monitors for continuous video, providing a secondary video connection in the event of signal interruption on the initial video connection. The same video signal should be tied to two systems so that if the first signal is interrupted, it continues by switching to the alternate input playing the same signal.
MUTE SETTING and STILL function 1:39
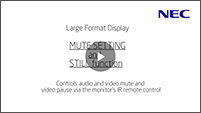
Use the MUTE SETTING function to mute the audio output and video (blacks-out the screen) by remote control operation. Alternatively, you can use the remote control STILL operation to freeze a displayed image.
*Using the MUTE SETTING or STILL function does not affect the externally connected device's audio/video signal; it continues playing and does not stop based on the monitor's audio/video state.
QUICK INPUT CHANGE 1:20
When switching to a different video input, you can switch quickly without an interruption in the video signal. We will show you how to switch between the two selected inputs without sandwiching the black screen for a few seconds.
TILE CUT 2:30
You can isolate and enlarge to full-screen a portion of the video image that suits your purpose, such as a weekly sale. This video shows you how to cut out a part of the video and enlarge it.
G-sensor(Rotation Detection) 0:47

This function prevents failures due to incorrect installation practices when installing a monitor in portrait orientation. The built-in sensor detects the monitor's installation orientation; if it is different from the supported orientation, a warning shows on the monitor screen and the correct rotation direction.
Auto input change 3:01
This video shows you how to set up signal detection so that the active input switches automatically to display images instead of manually selecting an input terminal.
This function is suitable for signage usage where a screen needs to show content continuously or meetings and presentations where multiple people share a monitor.
Self-calibration 2:25
This video shows you how to perform a color calibration with the MDSVSENSOR 3 color sensor to improve image quality after long-term use.
We recommend performing calibration when the color difference has occurred due to long-term use or the color difference between monitors is noticeable in a multi-monitor configuration.
ME Series
- ME431, ME501, ME551, ME651
INSTALLING OPTION BOARD TUTORIAL (for Trained Inatallers) 1:12
Introducing the procedure for incorporating the option board into the monitor. It supports Intel® Smart Display Module Small (SDM-S) / Large (SDM-L) standards.
UN Series
- UN552, UN552V, UN552S, UN552VS, UN552A, UN492S, UN492VS, UN462A, UN462VA
AUTO TILE MATRIX SETUP TUTORIAL 1:36
We will show you how to combine multiple monitors and display them as one large screen. This is the setting procedure after connecting the video signal and LAN cables to all monitors in a daisy chain (feed wiring).
SETTING COPY TUTORIAL 1:31
When using multiple monitors, you can easily align their screen colors and device settings. Learn how to copy the initial monitor's OSD menu settings to the other monitors using the LAN daisy chain connection.
STAND-ALONE CALIBRATION TUTORIAL 2:30
Color calibration is needed when color shift between monitors is a concern, such as deterioration over time due to long-term use. This video shows you how to connect our MDSVSENSOR 3 color sensor directly to the monitor for color matching with stand-alone color calibration.
WHITE COPY TUTORIAL 2:31
You can quickly get a close match to an adjacent monitor's color when needed, such as after replacing a monitor in a multiple monitor setup. This video will show you how to connect our MDSVSENSOR 3 color sensor directly to the monitor and automatically adjust the color shift.
AUTO ID/IP SETTING TUTORIAL 1:26
When setting multiple monitors, you can operate all the monitors at once with one remote control or operate only the specific monitor. This video will show you how to use the sensor unit and LAN daisy chain connection to link remote control operations to each monitor.
Desktop Displays
EA Series
- EA242WU, EA242WU-BK
Connecting USB-C/LAN and OSD setting 2:12
Model: EA242WU
This monitor is installed a USB-C port and LAN port.
Provides stable and high-speed data communication by LAN (RJ-45) connection
Transmits power delivery, video signal, and audio signal by a USB Type-C cable.
PA Series
- PA271Q, PA311D
COLOR CALIBRATION WITH GENERIC COLOR SENSOR TUTORIAL 1:26
This video shows you how to set the image quality based on your color sensor's measured values, correct the screen's color shift of the monitor due to long-term use, and maintain consistent image quality. In this video, color calibration is performed using a general color sensor.
COLOR CALIBRATION WITH MDSVSENSOR 3 TUTORIAL 3:01
This video shows you how to set the image quality based on your color sensor's measured values, correct the screen's color shift of the monitor due to long-term use, and maintain consistent image quality. In this video, our MDSVSENSOR 3 color sensor is used to perform color calibration.
SETTING COPY TUTORIAL 2:23
When using multiple monitors of the same series, you can easily match screen colors and device settings between monitors. We will show you how to copy the initial monitor's OSD menu settings to another monitor using USB memory.
WHITE COPY TUTORIAL 1:25
You can quickly bring two screens' colors closer to each other, such as after connecting to a laptop computer. We will show you how to measure the white color of the base monitor with our MDSVSENSOR 3 color sensor and copy it to the monitor on the side to which the color sensor is connected.